This guide walks you through the full setup, from creating your account to your AI going live on your Facebook page. The whole thing takes about 5 minutes.
Before you start, make sure you have a Page on Facebook and Business Portfolio on Meta Business Suite
Step 1: Create your account
Go to chatcopilot.app and click Try Free.
You will see a signup form asking for your name, phone number, email, business name, and password.
After filling in the form, click Sign up. ChatCopilot will send a verification email to the address you provided. Open that email and click the verification link to activate your account.
Once verified, log in and you will land on your dashboard.
Prefer to sign up with Facebook? You can also click Continue with Facebook on the website. This skips email verification and connects your Facebook account in one go. If you use this option, your Facebook page will already be connected when you reach the setup flow, so Step 3 below will show "Connected" automatically.
Step 2: Start the setup from your dashboard
After logging in, your dashboard shows a setup banner at the top: "Let's teach your AI about your business."
Click Continue setup. This opens the 5-step setup flow.
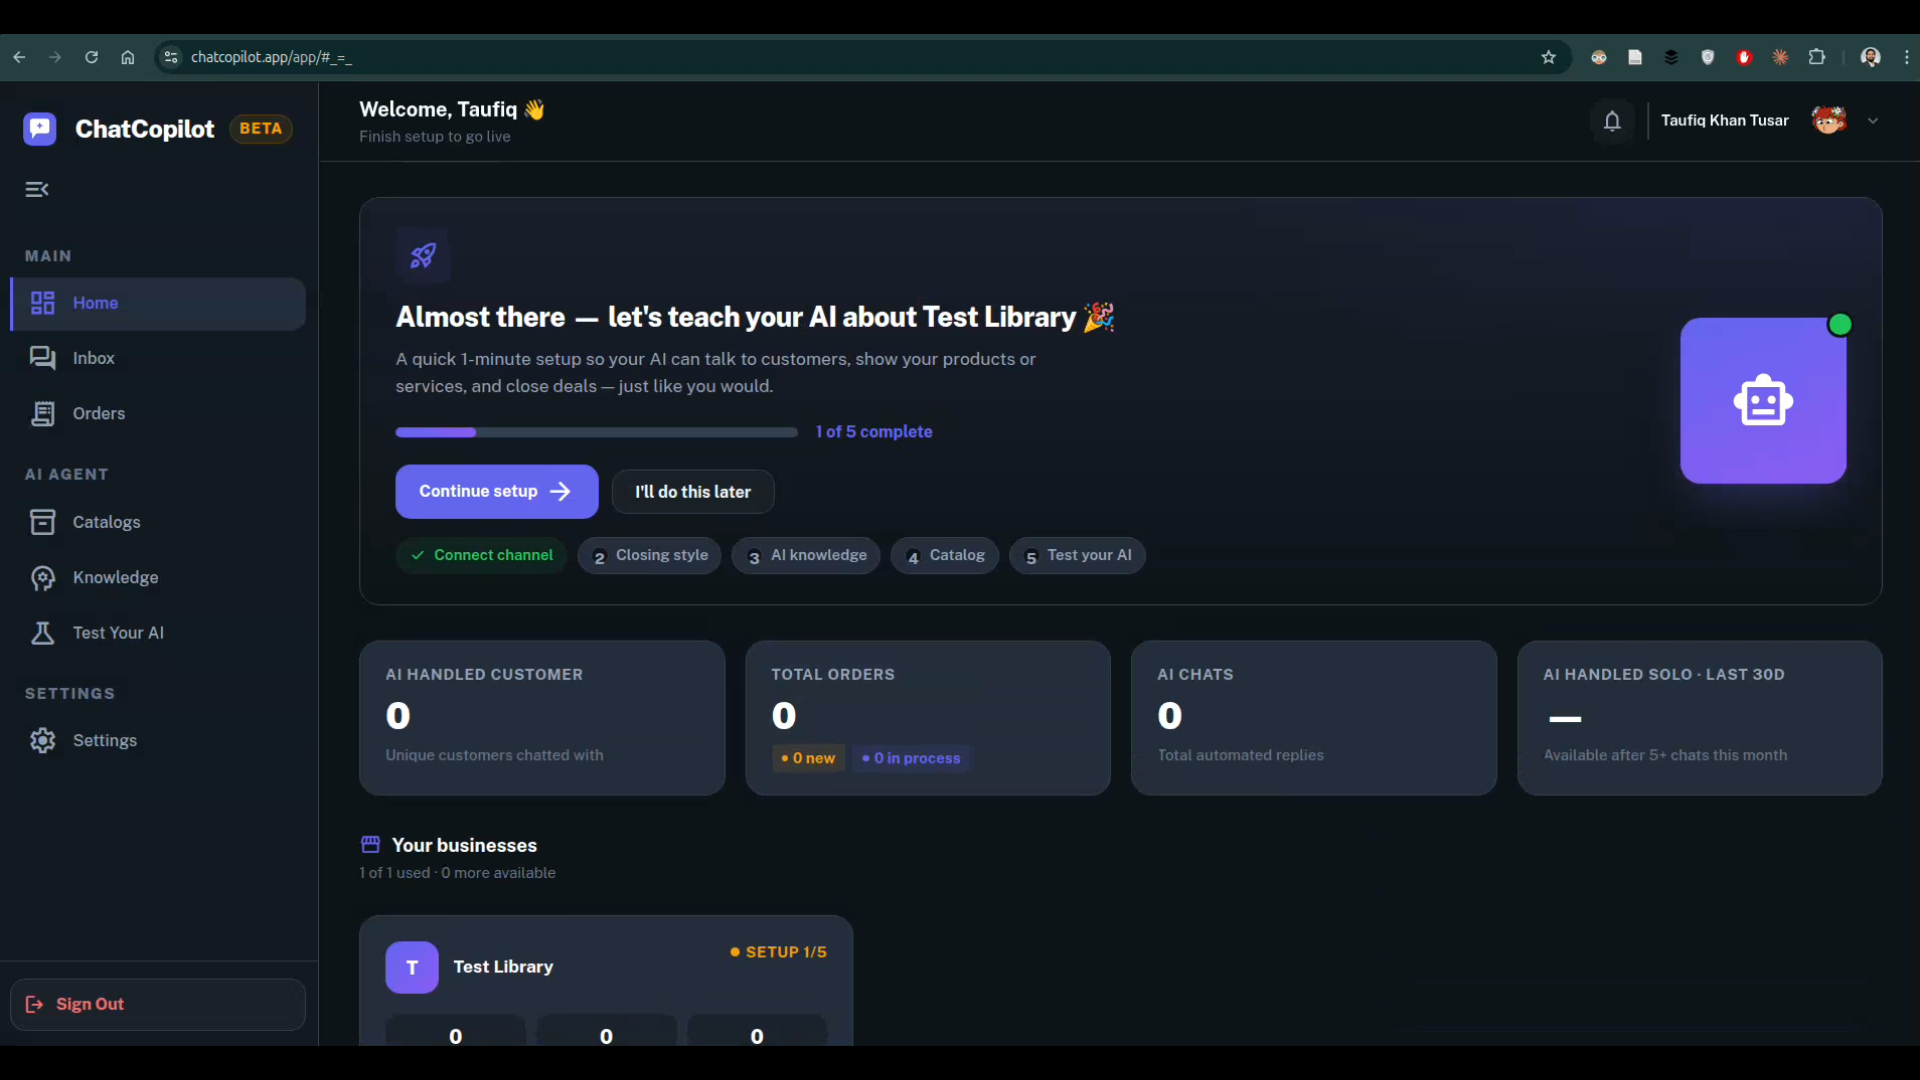
You can also click I'll do this later and setup manually. Your AI will not reply to customers until setup is complete.
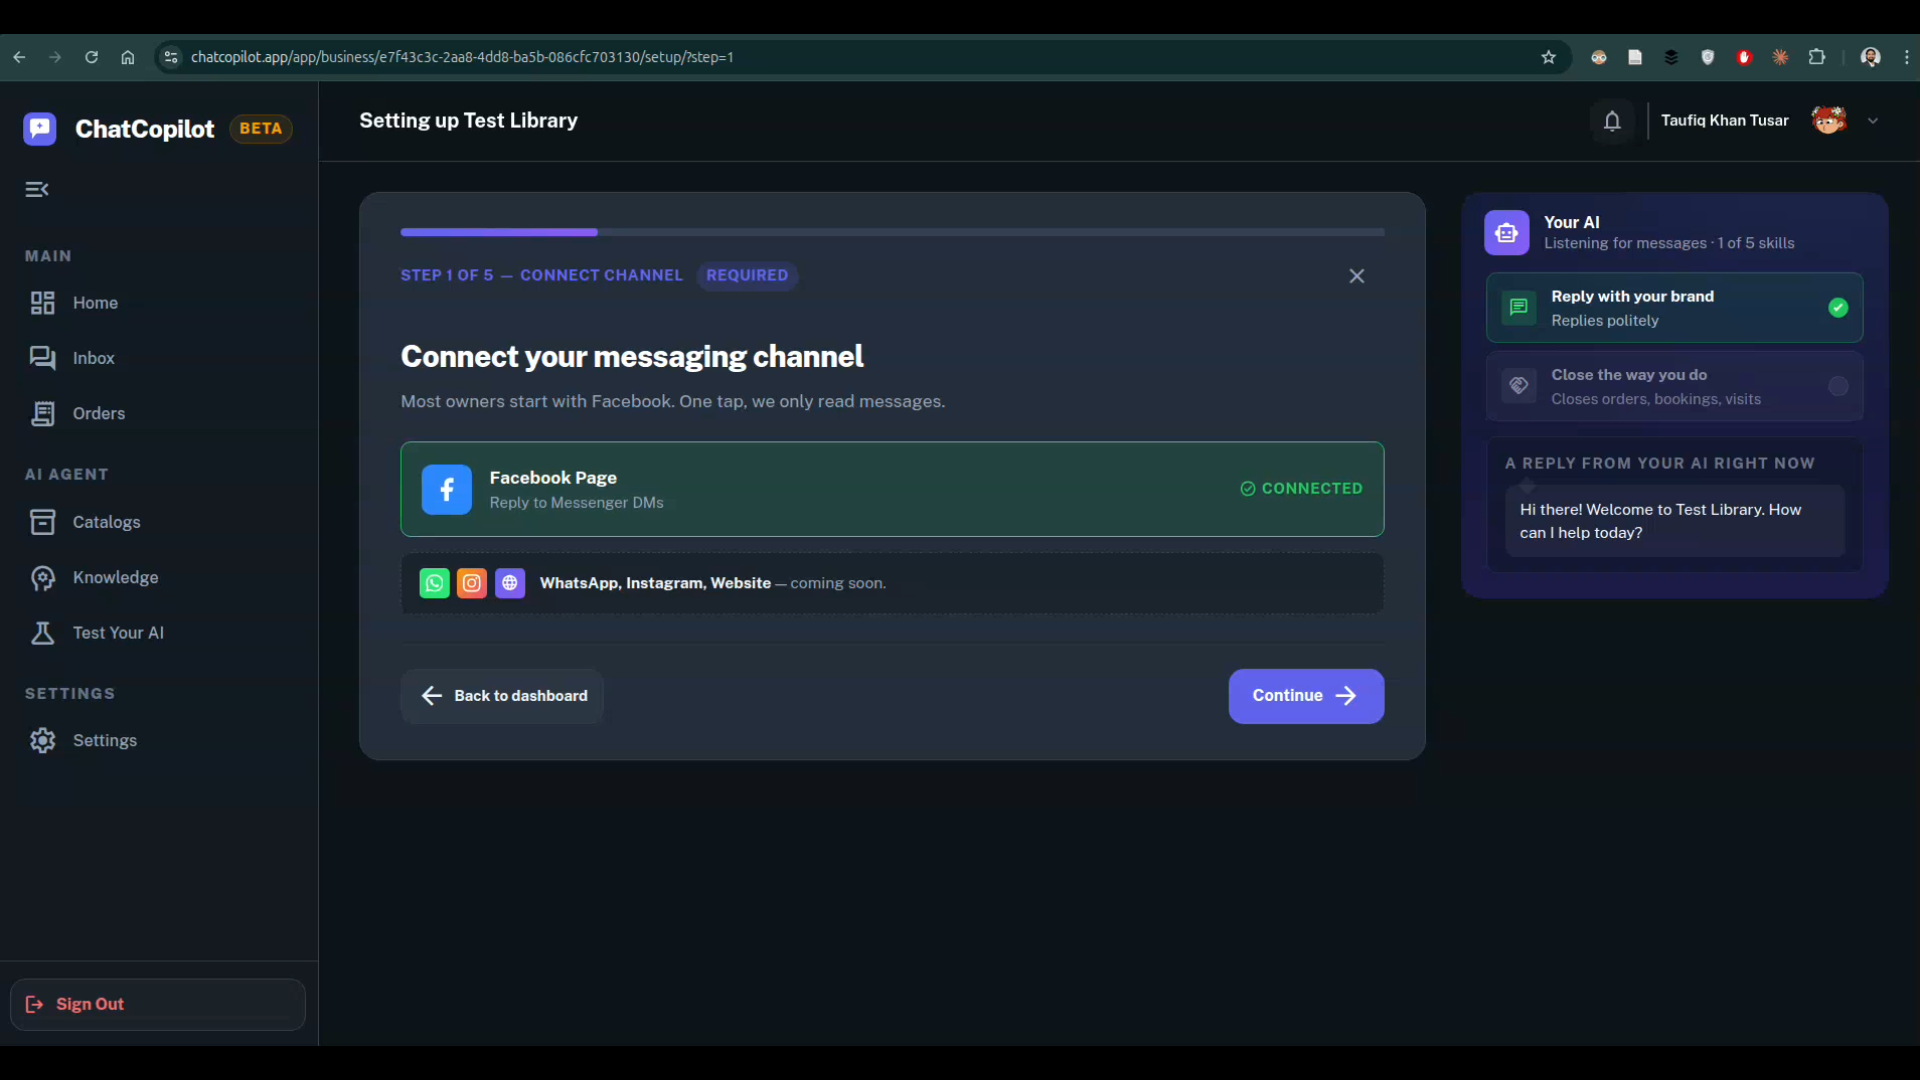
Step 3: Connect your Facebook page (Step 1 of 5)
This step connects ChatCopilot to your Facebook Messenger inbox.
Click Facebook Page. A Facebook popup will open. Follow these screens:
Screen 1: Add a page Select the Facebook page you want to connect with chatcopilot. If you manage multiple pages, they will all appear here. Pick the one for this business.
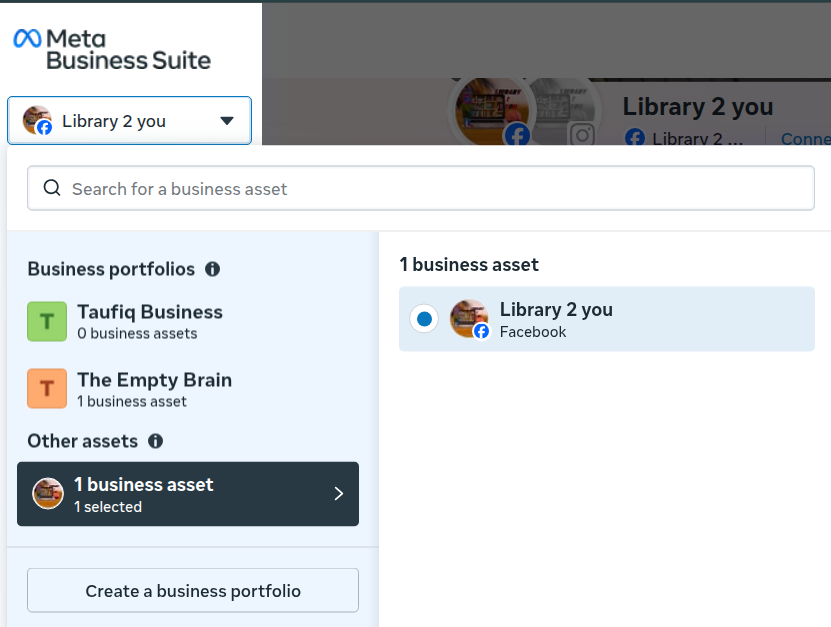
Screen 2: Choose your Meta Business account Select the Meta Business portfolio that owns your page. If you only have one, it will already be selected.
Screen 3: Review permissions Facebook will show you a list of what ChatCopilot is asking access to:
- Receive your email address: used to identify your account
- Manage and access Page conversations on Messenger: so the AI can read and reply to messages
- Manage accounts, settings and webhooks: needed to keep the connection active
- Show a list of the Pages you manage: so you can pick your page in the dashboard
These are standard permissions for any Messenger integration. ChatCopilot does not post to your page, does not access your personal profile, and does not sell your data.
Click Save, then Got it on the confirmation screen.
Back in ChatCopilot, your page will now show a green Connected badge. Click Continue.
What if your page is not showing up? This usually means your Facebook account does not have admin or editor access to that page. Log into Facebook, go to your page settings, check your role, and try again. Another reason can be your still do not have a Business Portfolio at Meta Business Suite. It is quite easy to create.
Step 4: Set your closing style and business info (Step 2 of 5)
This step tells your AI how your business works so it can close conversations the right way.
Pick one of three closing styles:
- We deliver to the customer — You sales, customer pays, you deliver. Good for shops, food, fashion, electronics, gifts.
- We take appointments — customer books a time, AI confirms it. Good for clinics, salons, consultants, tutors.
- We visit the customer — you go to customers place, AI books the visit. Good for AC repair, Photography agency, plumbing, broadband, home services.
Then write a short business description. Two to three sentences is enough. Example:
We sell men's and women's clothing from our Dhaka-based Facebook page. We deliver across Bangladesh in 2 to 5 days. Cash on delivery available.
Finally, select your reply language: English or Bengali. This sets the default language your AI replies in. Your AI will still understand messages in the other language, it will just reply in whichever you choose here.
Timezone is set automatically to Asia/Dhaka.
Click Save and continue.
Step 5: Add your AI's knowledge (Step 3 of 5)
This is where your AI learns about your business. It uses this to answer customer questions correctly.
You can pick from five ready-made templates:
- Digital Seller — for courses, ebooks, downloads, paid newsletters
- Home Service — for repair, plumbing, broadband, and similar visit-based services
- Product Sales and Delivery — for shops selling physical items
- Professional and General Service — for clinics, consultants, gyms, tutors
- Start from Scratch — a blank template you can fill in yourself
Pick the one closest to your business. A text editor will open with a pre-filled template. Edit it to match your actual business: your hours, delivery areas, return policy, or anything else customers usually ask.
You can also write your own from scratch or upload a text file instead of using a template.
Important: Each knowledge file holds up to 3,000 characters on the free Beta plan. Use clear, simple sentences. Avoid long paragraphs. The AI reads exactly what you write here, so the more accurate it is, the better it performs.
On the free Beta plan, you get 1 knowledge file. The Pro plan supports 3 files of 3,000 characters each.
Click Continue when done.
Step 6: Add your product or service catalog (Step 4 of 5) — Optional
If you sell products or services with a structured list, upload it here. Accepted formats: CSV or Excel.
This is optional. If you skip it, your AI will still work using the knowledge file from the previous step. You can always add a catalog later from the Catalogs section in your dashboard.
Click Continue to proceed.
Step 7: Test your AI, then go live (Step 5 of 5)
Before going live, you can test your AI using the built-in sandbox. Click Open test chat to start a practice conversation. This is private, your customers cannot see it.
Try typing the kinds of messages your customers usually send. Check if the replies are accurate. If something is wrong, go back and edit your knowledge file.
When you are happy with how it responds, click Finish and go live.
Your AI is now live on your Facebook page. Any message sent to your page from this point will be handled automatically.
What happens after you go live
Your dashboard will start showing activity as customers message your page:
- AI Handled Customers — unique customers the AI has chatted with
- Total Orders — orders collected by the AI
- AI Chats — total automated replies sent
You can read every conversation in the Inbox section. If a customer asks something your AI cannot answer, it will tell them politely and the conversation will appear in your inbox for you to follow up.
Other sections in your dashboard
- Inbox — all customer conversations across all your connected pages in one place
- Orders — every order your AI has collected, with customer details and status
- Catalogs — upload or update your product and service list
- Knowledge — view and edit the knowledge files your AI is using
- Test Your AI — run private test conversations anytime before or after going live
- Settings — update your profile, notification preferences, and plan details
Need help?
Join the ChatCopilot WhatsApp community for support and updates.